Finishing Touches
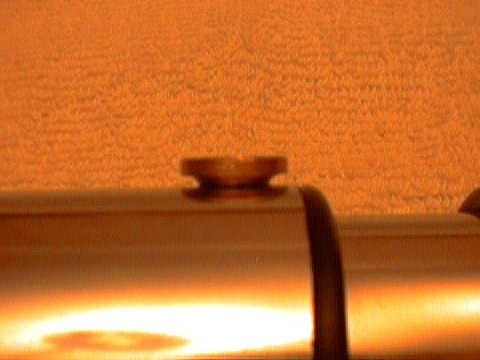
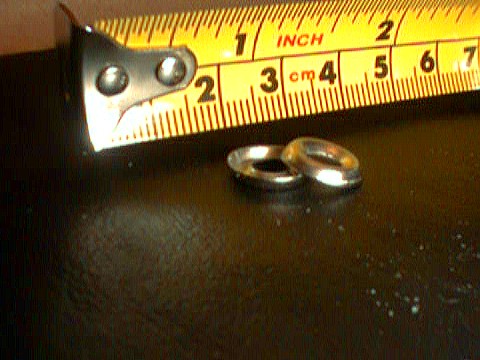
Take a knurled nut.
 Cut this nut into two pieces at the waist. The smaller (unridged) piece
will be the blade length adjustment (BLA) and the larger piece will be
the activator button. Into the top hole of the activator piece use some
high strength two-part epoxy to set a small rivet. The rivet is just decorative,
to keep you from having a hole in the middle of the faux button. Prime
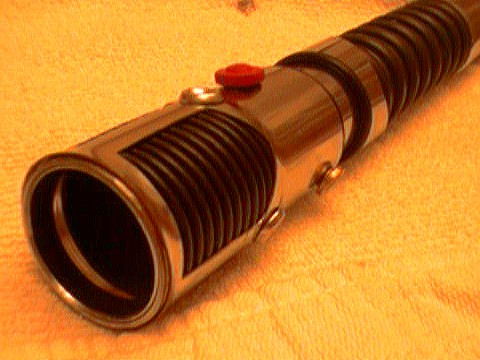
the activator(with rivet), paint it red, then seal it with clear coat.
The BLA looks fine in the natural color. The symetry on the saber is tri-lateral.
You should line up the BLA, the activator, and the clip knob each with
a different post between the emitter vents. As you did on the clip knob,
you should round out the base of the BLA and activator so that they will
sit better on the emitter tube. It's a good idea to scuff up the surface
of the tube where BLA and activator will be set to give the epoxy a better
hold.
Cut this nut into two pieces at the waist. The smaller (unridged) piece
will be the blade length adjustment (BLA) and the larger piece will be
the activator button. Into the top hole of the activator piece use some
high strength two-part epoxy to set a small rivet. The rivet is just decorative,
to keep you from having a hole in the middle of the faux button. Prime
the activator(with rivet), paint it red, then seal it with clear coat.
The BLA looks fine in the natural color. The symetry on the saber is tri-lateral.
You should line up the BLA, the activator, and the clip knob each with
a different post between the emitter vents. As you did on the clip knob,
you should round out the base of the BLA and activator so that they will
sit better on the emitter tube. It's a good idea to scuff up the surface
of the tube where BLA and activator will be set to give the epoxy a better
hold.
 Take three finishing washers.
 At the base of each post between the vent adhere a finishing washer with
epoxy.
At the base of each post between the vent adhere a finishing washer with
epoxy.
 If you have followed these steps you should have a perfectly unmarred inner
surface on your base tube which will nicely accomidate any blade, emitter
detail, or electronics you'd like to add.
If you have followed these steps you should have a perfectly unmarred inner
surface on your base tube which will nicely accomidate any blade, emitter
detail, or electronics you'd like to add.
 If you aren't concerned with that (the smooth interior), then you may want
to attach the BLA and the activator with bolts & nuts as the clip knob
was since these are the only components that aren't rock solid. Read
the instructions on your epoxy. If it says it takes eight hours to set,
then don't start poking at it for eight hours. I learned this one the hard
way.
If you aren't concerned with that (the smooth interior), then you may want
to attach the BLA and the activator with bolts & nuts as the clip knob
was since these are the only components that aren't rock solid. Read
the instructions on your epoxy. If it says it takes eight hours to set,
then don't start poking at it for eight hours. I learned this one the hard
way.
Home Style
#2 Parts List
Emitter Tube Base
Tube Grip Tube
Pommel Tube Clip
Knob Emitter Assembly
Grip Assembly Pommel
Assembly Finishing
Touches Email
Me