Pommel Section Assembly
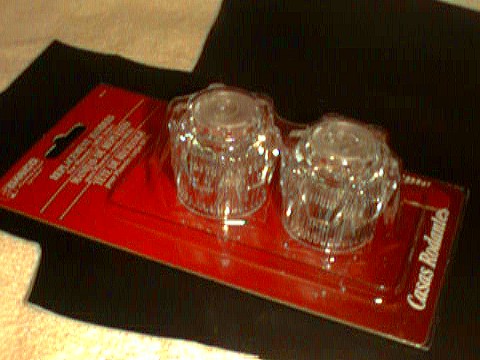
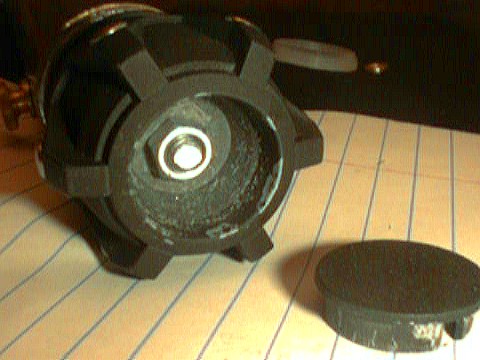
Take a faucet handle. The included screw won't be needed.
 Prime and paint the handle and its cap then add a couple layers of a clear
paint sealer to keep that black paint on the pommel and off of you.
Prime and paint the handle and its cap then add a couple layers of a clear
paint sealer to keep that black paint on the pommel and off of you.
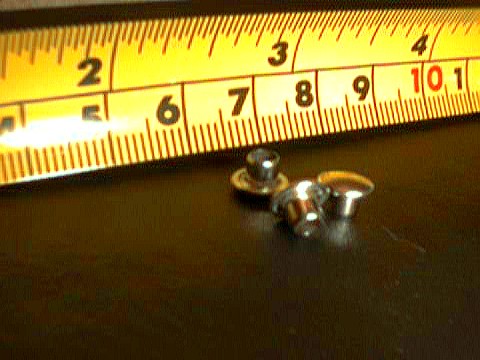
 Drill six small holes into the handle and into them glue the rivets for
decoration.
Drill six small holes into the handle and into them glue the rivets for
decoration.
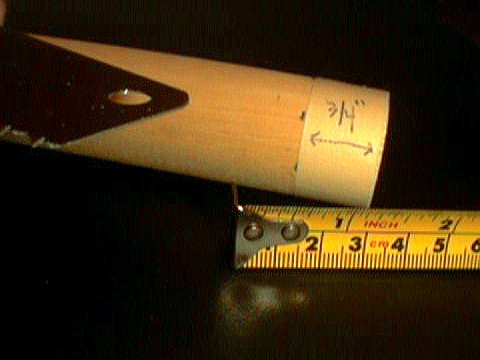
 Take your dowel rod and cut off a 3/4" section. I
actually had this cut done for me in the hardware store. Most will do it
if you ask them, for free or for pennies.
Take your dowel rod and cut off a 3/4" section. I
actually had this cut done for me in the hardware store. Most will do it
if you ask them, for free or for pennies.
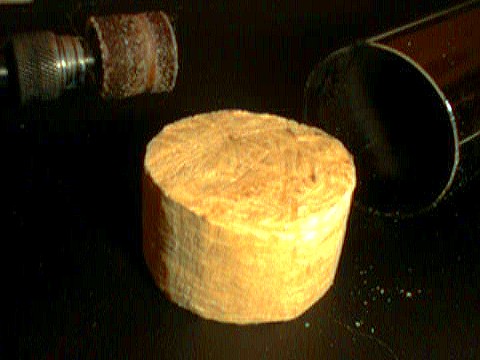
 Use a sanding drum on this section until it will fit into the end of the
base tube.
Use a sanding drum on this section until it will fit into the end of the
base tube.
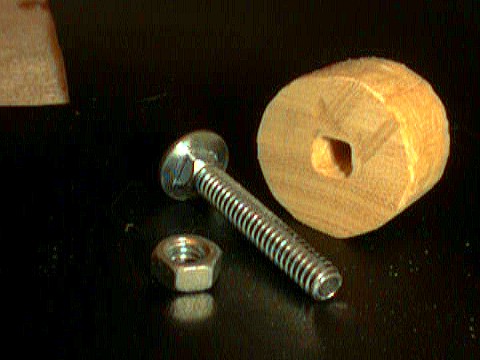
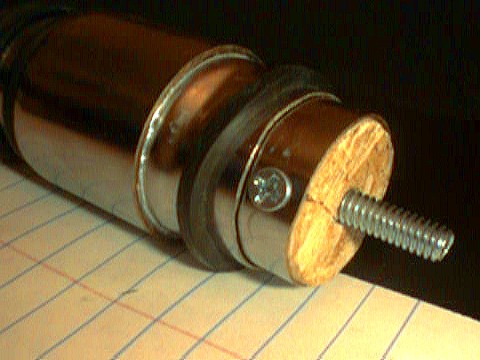
 Through the center of the dowel section drill a 1/4" hole for the carriage
bolt. Use a small grinding stone on the rotary tool to square up one end
of the hole so that it will hold the bolt without it turning.
Through the center of the dowel section drill a 1/4" hole for the carriage
bolt. Use a small grinding stone on the rotary tool to square up one end
of the hole so that it will hold the bolt without it turning.
 On the end of the base tube drill a hole that is just smaller than the
head of the small wood screw.
On the end of the base tube drill a hole that is just smaller than the
head of the small wood screw.
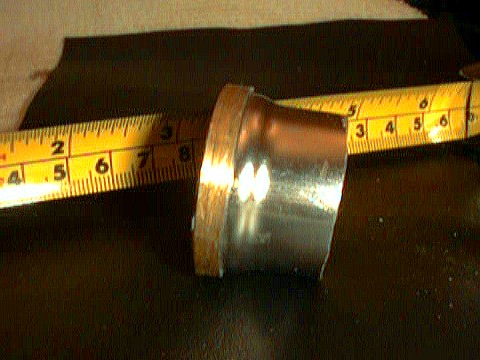
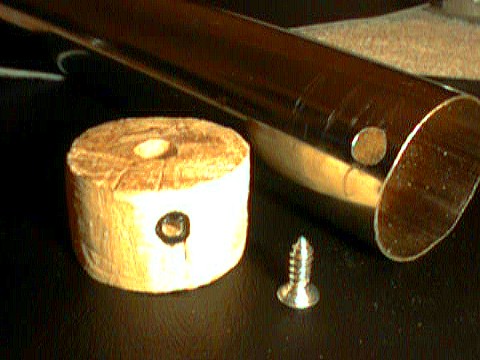 Take the pommel tube section and place it into base of the grip tube section
around the 1-1/4" base tube. Using the hole in the base tube as a guide
mark a place for pilot hole on the dowel section. You want a 1/8" to 1/16"
of wood extending from the back of the tube. Drill a small pilot hole for
the wood screw. Make sure your hole is deep and wide
enough or the wood might crack when you drive in the screw like mine did.
If it cracks, though, it really makes little difference.
Take the pommel tube section and place it into base of the grip tube section
around the 1-1/4" base tube. Using the hole in the base tube as a guide
mark a place for pilot hole on the dowel section. You want a 1/8" to 1/16"
of wood extending from the back of the tube. Drill a small pilot hole for
the wood screw. Make sure your hole is deep and wide
enough or the wood might crack when you drive in the screw like mine did.
If it cracks, though, it really makes little difference.
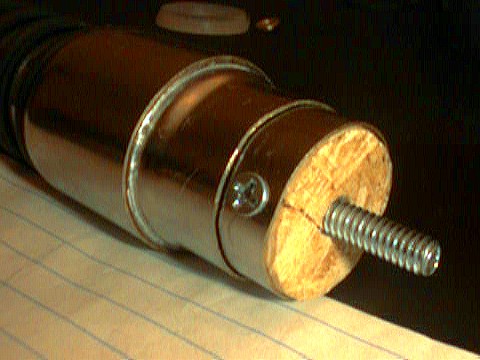
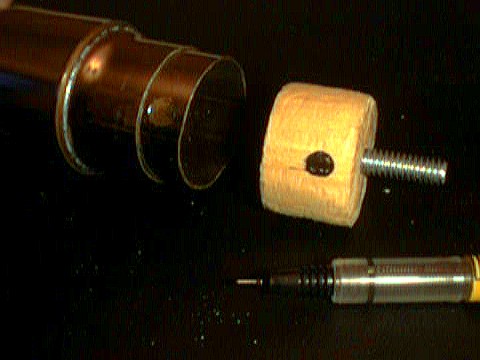 Secure the dowel section in its place with the woodscrew.
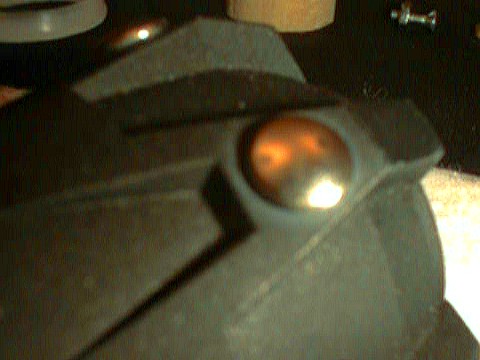
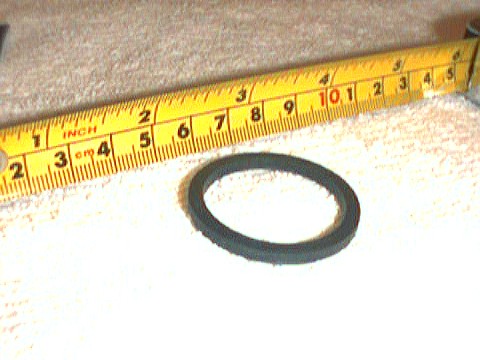
 Place the 1-1/4 black rubber washer over the pommel section tube.
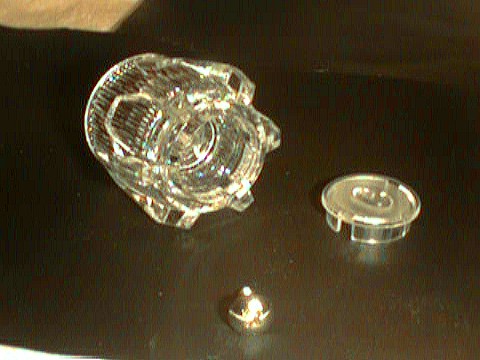
 Place the faucet handle over the extended section of the carriage bolt
and tighten down the nut. Then slide the rubber washer down to create a
nice looking seal. Replace the cap on the faucet handle.
Place the faucet handle over the extended section of the carriage bolt
and tighten down the nut. Then slide the rubber washer down to create a
nice looking seal. Replace the cap on the faucet handle.
Home Style
#2 Parts List
Emitter Tube Base
Tube Grip Tube
Pommel Tube Clip
Knob Emitter Assembly
Grip Assembly Pommel
Assembly Finishing
Touches Email
Me